


Pre-Shipment Kitchenware Inspection Checklist for Importers


Short answer: A pre-shipment kitchenware inspection should define the finished lot and its approved specification, agree how units will be selected and assessed, check appearance, function and packaging against that reference, and record every result. A sampling plan helps buyers make a consistent lot decision; it does not prove every unit is defect-free or replace product-specific acceptance criteria.
This checklist is for the stage after the buyer and supplier have approved the product specification and reference sample. It is different from reviewing an early sample: the question now is whether the finished goods prepared for shipment match the agreed requirements. For the earlier sample sign-off stage, see our kitchenware sample approval checklist.
1. Define the lot before selecting samples
Write down which production quantity is being considered as one inspection lot. Record the product name and SKU, order or purchase reference, production batch or date code, quantity presented, packaging configuration, inspection location and date. If the order contains different models, colors, materials, sizes or packaging versions, do not quietly combine them into one indistinguishable group. Define separate lots or sampling groups where the agreed plan calls for it.
Confirm that production is complete and that the quantity presented is packed or staged in the condition that will ship. Identify cartons that are missing, damaged, unlabelled or held aside. The supplier and buyer should agree which units and cartons are in scope before random selection begins; otherwise, a sample may not represent the shipment under review.
2. Agree the inspection basis
Use the latest approved specification, signed sample or other controlled reference. The document should identify the version, key dimensions and tolerances, materials, colors, construction, finish, included accessories, required function, marking and packaging. Resolve differences between purchase order, artwork, product specification and sample before inspection starts. A photograph can help identify a version, but it should not replace a measurable requirement where one is needed.
Agree the inspection method, tools, operating conditions and acceptance criteria in advance. For example, define how a dimension will be measured, what counts as a visible finish defect, how a component’s retention will be checked, and which packaging artwork revision is approved. Use calibrated or otherwise suitable measuring equipment where the contract or measurement risk requires it. The inspector should record what was actually checked instead of assuming the sample represents every requirement.
If the parties use attribute sampling, ISO 2859-1:2026 describes sampling schemes for lot-by-lot inspection by attributes. The chosen plan depends on the lot, inspection level, agreed acceptance criteria and the parties’ contract. An acceptance quality limit (AQL) designation is part of a sampling scheme; it is not the observed defect rate, a promise that a lot contains no defects, or a guarantee that each unit is fit for use. There is no single sample size or AQL value that is suitable for every kitchenware order. Buyers and suppliers should agree the plan before production or inspection, not choose a favorable value after seeing results. The ASQ sampling overview explains the basic idea and why a sample is only a subset of a lot.
3. Select samples across the defined lot
Follow the agreed sampling plan and document the selection method. Select from different cartons and positions across the lot when practicable, rather than taking only the easiest units from one open carton. If cartons contain mixed models or versions, preserve the agreed grouping and identify which group each sample represents. Record the carton numbers or other traceable identifiers for the selected units.
Do not replace a selected unit merely because it looks damaged or inconvenient to inspect. Record the condition and follow the agreed procedure for inaccessible or damaged goods. Keep inspected samples identifiable until the decision is documented. Where a check is destructive or consumes product, confirm in advance how those units will be treated and whether the buyer or supplier retains them.
4. Check appearance and construction
Compare each selected unit with the approved reference under adequate lighting. Use criteria appropriate to the item and the market, and separate safety or function concerns from cosmetic preferences.
- Identity and completeness: Confirm SKU, model, color, set count and included parts. Check that the unit is the order version rather than a visually similar alternative.
- Materials and finish: Look for unexpected corrosion, stains, sharp burrs, cracks, chips, dents, discoloration, coating damage, loose fibers, contamination or other conditions named in the specification. Inspect food-contact and non-food-contact surfaces as defined by the product requirements.
- Assembly and edges: Check joints, rivets, welds, handles, fasteners, covers and moving parts for visible defects or looseness. For cutting or grating products, inspect edges using the agreed safe method and avoid handling exposed edges as if they were blunt.
- Dimensions and weight: Measure only the dimensions and weight that are specified for acceptance, using the stated reference points and tolerances. Record actual readings where required; do not substitute a catalog listing’s nominal value for the order’s approved tolerance.
- Marking: Compare branding, country-of-origin statements, care instructions, warnings, batch codes and other required marks with the approved file and destination-market requirements.
Classify findings using the defect definitions agreed by the buyer and supplier. A useful record distinguishes critical safety or legal concerns, major issues that affect use or sale, and minor appearance differences. The names alone do not define acceptance: the contract or inspection plan must say which conditions fall into each class and how each is handled.
5. Check function with a repeatable method
Test the function that the product is sold and specified to perform. Use the same conditions for comparable samples and record the method, observations and any measurements. Avoid vague notes such as “works fine” when a repeatable result can be described.
For a concrete example, the live listing for MS00344A2 multifunctional kitchen scissors identifies the item as kitchen scissors and lists its overall size, thickness and weight. The catalog photograph below shows the scissors’ visible shape and handle appearance; it is not a photo of an inspected shipment.
An order-specific check could verify that the correct model is present, inspect the blades and handles for damage, and open and close the pivot using the agreed method. If cutting performance is part of acceptance, define the material, cut and pass/fail criterion in the specification.
The MV00645W6 food tongs listing describes SS430 food tongs and lists a 22 cm length, 0.8 mm thickness and 65.3 g weight. Use the agreed measurement points and tolerance for any order check; the nominal listing fields are not a substitute for an approved order specification.

An inspector could check the visible gripping ends for damage, compare the shape and alignment with the approved reference, and open and close the tongs to the agreed extent. If grip performance matters, agree a repeatable test and acceptance rule before inspection.
The live MV03048G bottle opener listing identifies a metal opener with a beech wood handle and lists its size and weight. The example photograph helps identify the listed item; it does not establish material composition beyond the listing or confirm how any production unit performs.
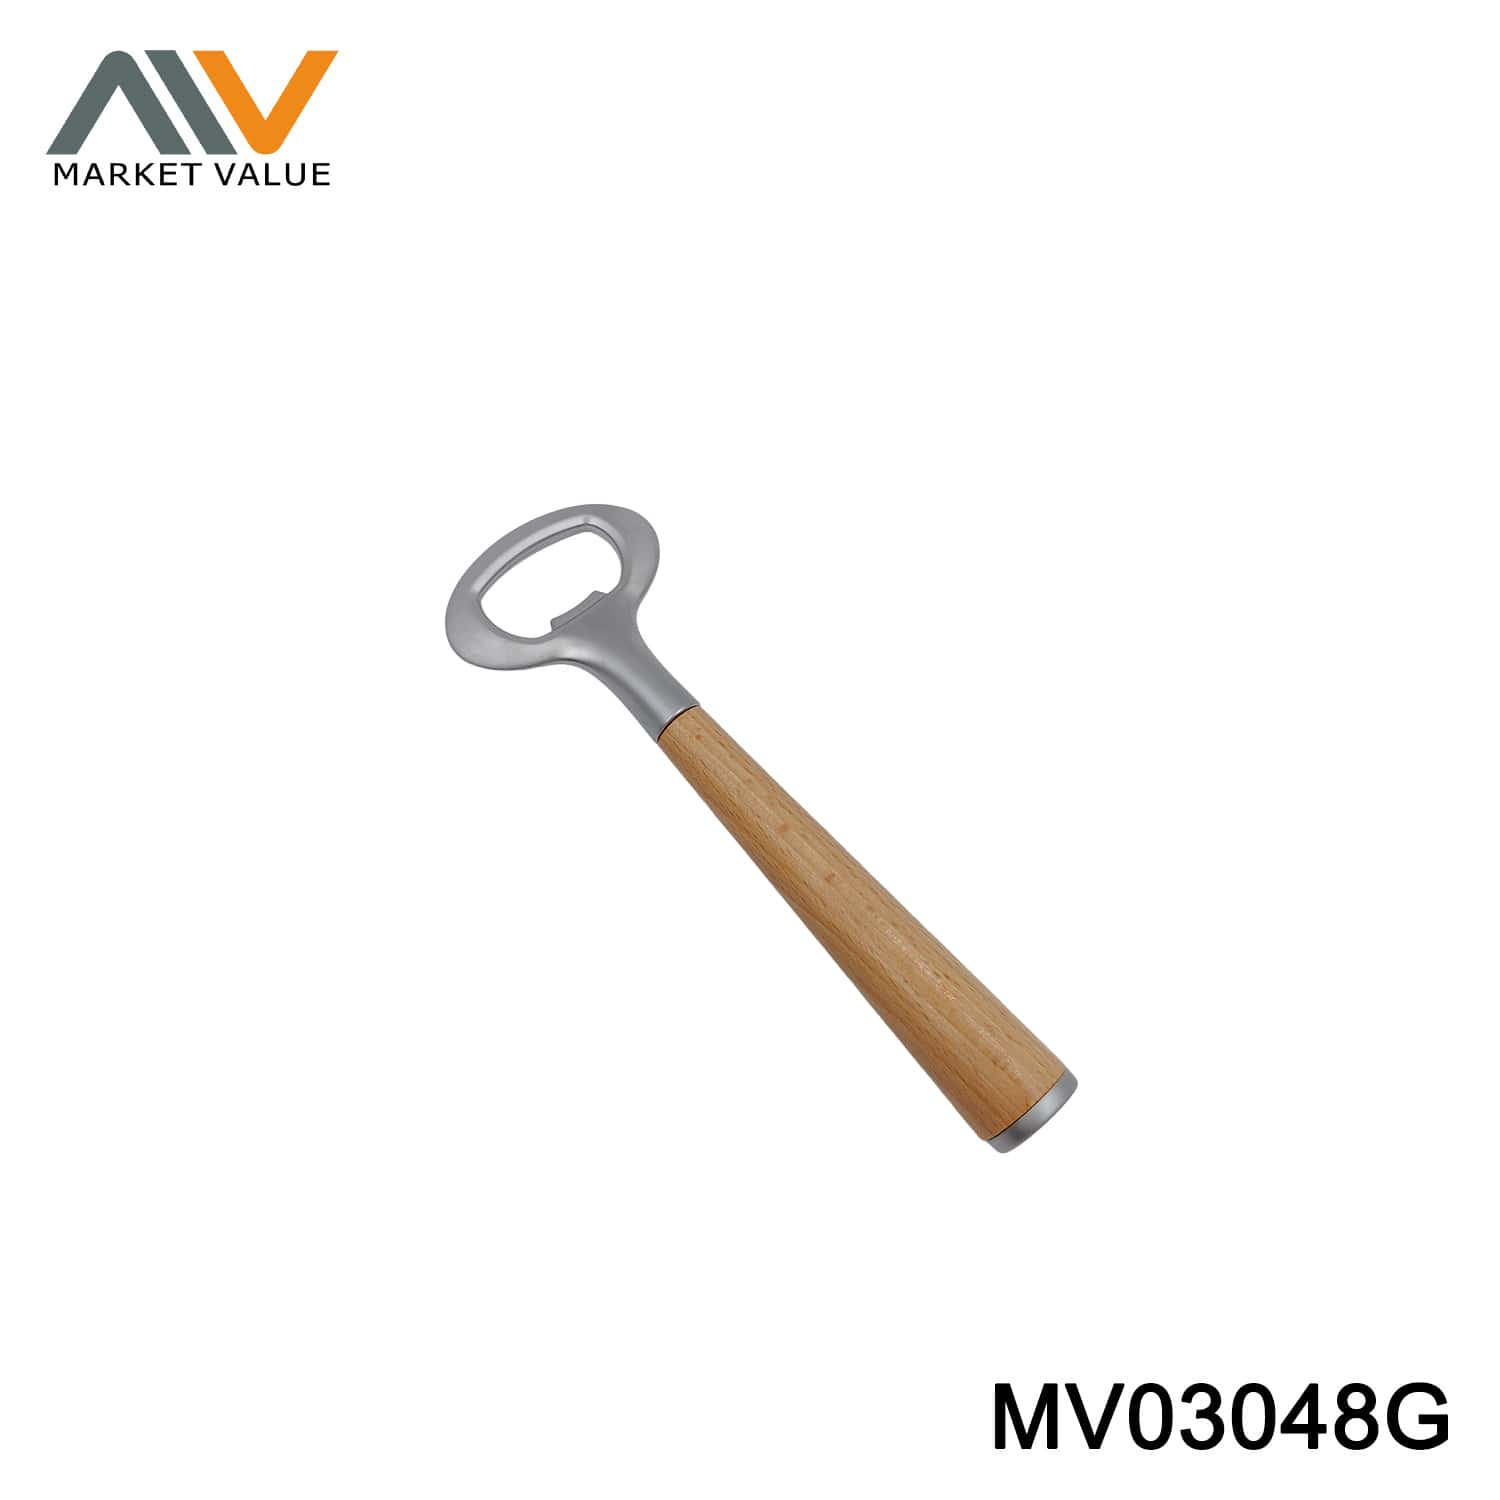
For an order requiring a functional check, agree the cap and container type, opening method and acceptable result. Inspect the handle-to-head connection and visible finish against the approved specification. Do not infer opening force, durability or a material test result from the photograph.
Other checks may include a lid closing and staying in place, a handle remaining secure during a defined load test, or a tool fitting its intended storage rack. Define load, cycle count, duration and pass/fail behavior in the approved specification when those checks matter. Do not invent test conditions at the inspection table.
6. Verify retail and shipping packaging
Compare the packed unit and shipping carton with the approved packaging specification and artwork. This checklist verifies that agreed packaging is used; it is not a packaging design brief. For design-stage questions, see the private-label kitchenware packaging checklist.
- Confirm product and accessory count per retail pack, inner carton and master carton.
- Check that the correct box, insert, protection, divider, bag, label and instruction sheet are present and fit the product as specified.
- Compare printed artwork, color, language, barcode, SKU and required warnings with the approved revision.
- Inspect closures and protective packing for damage, open seams, inadequate restraint or visible moisture exposure.
- Verify carton marks, destination details, assortment and quantity against the packing list and order instructions.
- Measure or weigh cartons only where the agreed shipping specification requires it, and record the method and result.
Do not approve a packaging change based only on appearance or convenience. The buyer should approve any revision that changes protection, labeling, retail presentation, carton quantity or shipping information. Record the approved version so later inspections can compare against the same reference.
7. Record findings and make a controlled decision
The inspection report should identify the order, lot, SKU, quantity presented, sampling plan, selected carton/unit identifiers, reference documents and their versions, inspection method, equipment where relevant, findings by defect class, photographs where useful, and the inspector and date. Record both passed checks and exceptions. If a measurement is outside the stated tolerance, include the actual result and the requirement it was compared with.
State the lot decision using the agreed plan: accepted, rejected, or held for further review. If any result is uncertain, evidence is incomplete, or the goods differ from the approved reference, hold the affected lot while the buyer and supplier decide what happens next. Possible actions include sorting or reinspection, repair, replacement, rework, a concession approved by the buyer only where applicable law and mandatory requirements allow it and the concession does not waive a safety or compliance failure, or rejection. Identify who owns each action, the deadline, affected quantity and the evidence needed to close it. A reinspection should use a documented method agreed by the parties; it should not erase the original finding.
Inspection and acceptance records do not by themselves establish regulatory compliance. If food-contact requirements apply, identify the destination market and product-specific documentation separately. The European Commission overview of food contact materials describes the EU framework; it does not certify a particular product or shipment.
For an OEM/ODM or wholesale order, Marketvalue’s OEM/ODM service and wholesale quotation page provide the relevant next step for discussing product specifications, samples, packaging and order requirements.
Frequently asked questions
Does a pre-shipment inspection guarantee that every unit is defect-free?
No. A sampling inspection evaluates selected units under an agreed plan. It can support a lot decision, but it does not prove every uninspected unit is free from defects. Buyers should match the plan and checks to the product risk and contract.
Is AQL the percentage of defective products in my shipment?
No. AQL is a parameter used in certain attribute-sampling schemes. It should not be presented as the measured defect rate or a promise about the quality of a specific lot. The parties need to agree the applicable plan and acceptance rules before inspection.
What if a sample unit fails a check?
Record the unit-level finding and identify its lot. One failed sample unit does not automatically mean the entire lot must be rejected; determine the lot decision from the sampling plan and defect rules agreed in advance. Hold the lot while investigating any serious safety or compliance concern. Follow the purchase agreement and agreed plan to decide whether further checks, sorting, rework, replacement, a permitted buyer-approved concession or rejection is appropriate. Do not silently replace the failed sample or change the acceptance rule after results are known.
Can product photos be used as inspection evidence?
Photos can document a visible condition when they are linked to the order, unit or carton and taken clearly. A catalog image shows an example of a listed product; it does not document the condition of a production shipment. Use traceable inspection photographs and written results for the actual lot.
Sources and Further Reading
- ISO 2859-1:2026, Sampling procedures for inspection by attributes: the current published edition for lot-by-lot attribute inspection sampling schemes.
- ASQ: What Is Sampling?: sampling overview and related considerations.
- European Commission: Food Contact Materials: EU framework overview; product-specific evidence must be evaluated separately.
- Marketvalue MS00344A2 listing, MV00645W6 listing and MV03048G listing: catalog examples and image sources only.